Spacemesh - Vultr Setup Guide


Step-by-step guide to rent a Vultr server and setup Spacemesh on it.
Table of Content
Server rental #
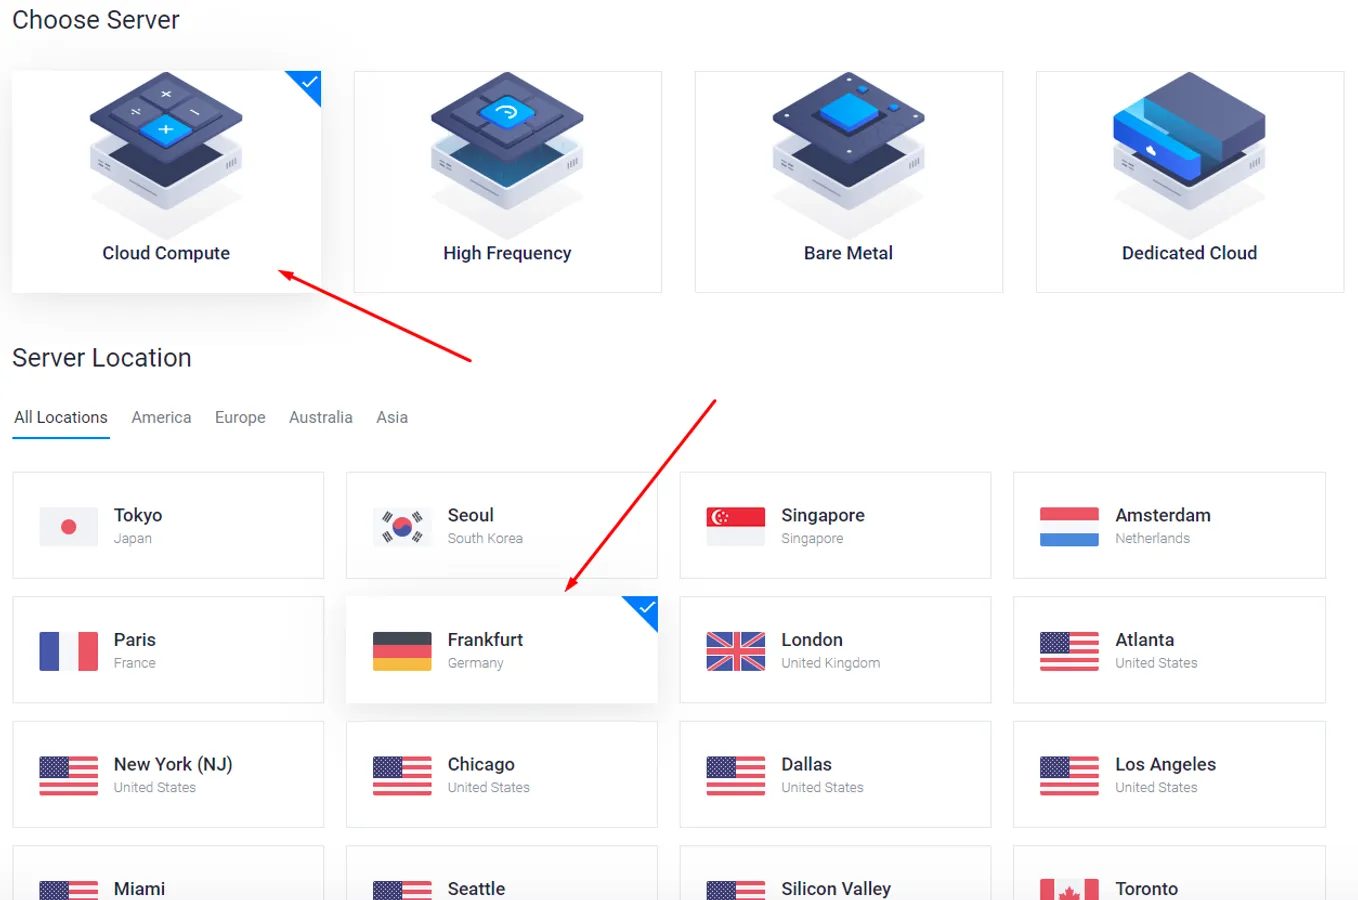
In order to run Spacemesh node we will use Vultr hosting, because they provide convenient access to graphical user interface.
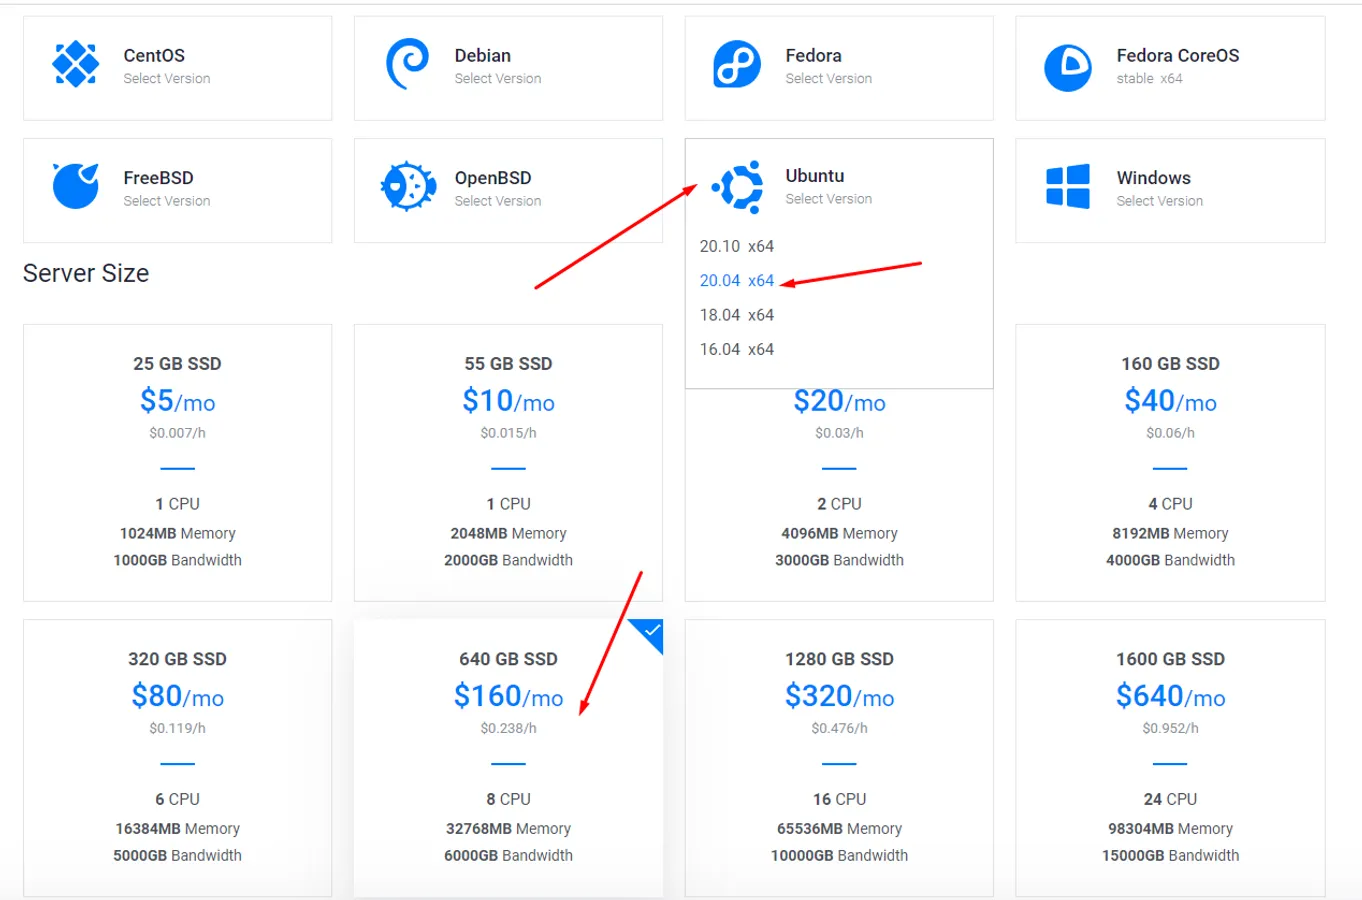
Choose server with OS Ubuntu 20.04, 8 vCPU and 32GB RAM (as per recommended system requirements, you can use less powerful system at your own risks):

Installation #
Use this script for installation:
#!/bin/bash

grep -q "swapfile" /etc/fstab
if [[ ! $? -ne 0 ]]; then
    echo -e '\n\e[42m[Swap] Swap file exist, skip.\e[0m\n'
else
    cd $HOME
    sudo fallocate -l 4G $HOME/swapfile
    sudo dd if=/dev/zero of=swapfile bs=1K count=4M
    sudo chmod 600 $HOME/swapfile
    sudo mkswap $HOME/swapfile
    sudo swapon $HOME/swapfile
    sudo swapon --show
    echo $HOME'/swapfile swap swap defaults 0 0' >> /etc/fstab
fi

sudo apt update
sudo apt --fix-broken install -y
sudo apt install ubuntu-desktop -y --fix-missing < "/dev/null"
wget -O spacemesh.deb https://storage.googleapis.com/smapp/v0.2.1-beta.2/spacemesh_app_0.2.1-beta.2_amd64.deb
sudo dpkg -i spacemesh.deb
crontab -l > spacemesh_cron
echo "@reboot screen -dmS gui bash -c 'startx ; exec bash'" >> spacemesh_cron
crontab spacemesh_cron
rm spacemesh_cron
screen -dmS gui bash -c 'startx ; exec bash'
echo 'All done!'
Connection #
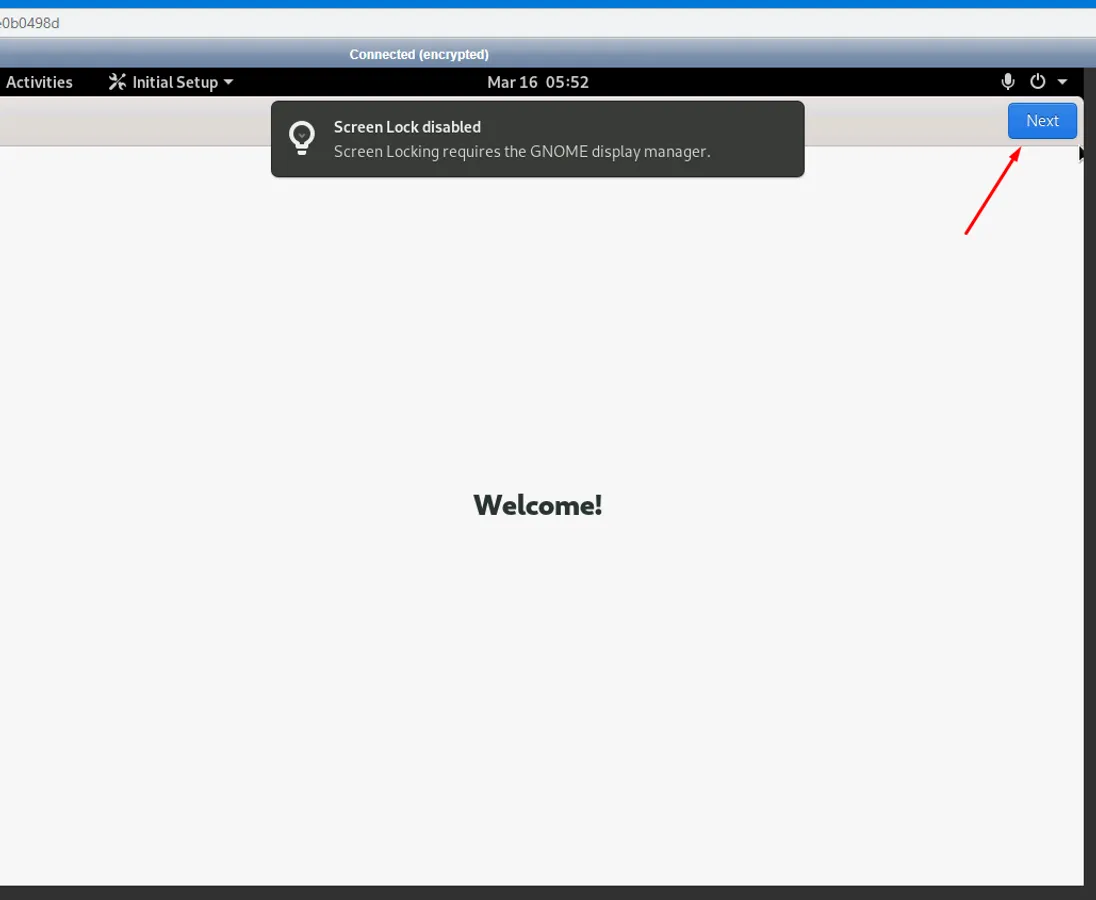
Connect to server with Vultr View Console:


You will see Ubuntu GUI on screen, click Next required number of times and then click Start Using Ubuntu:
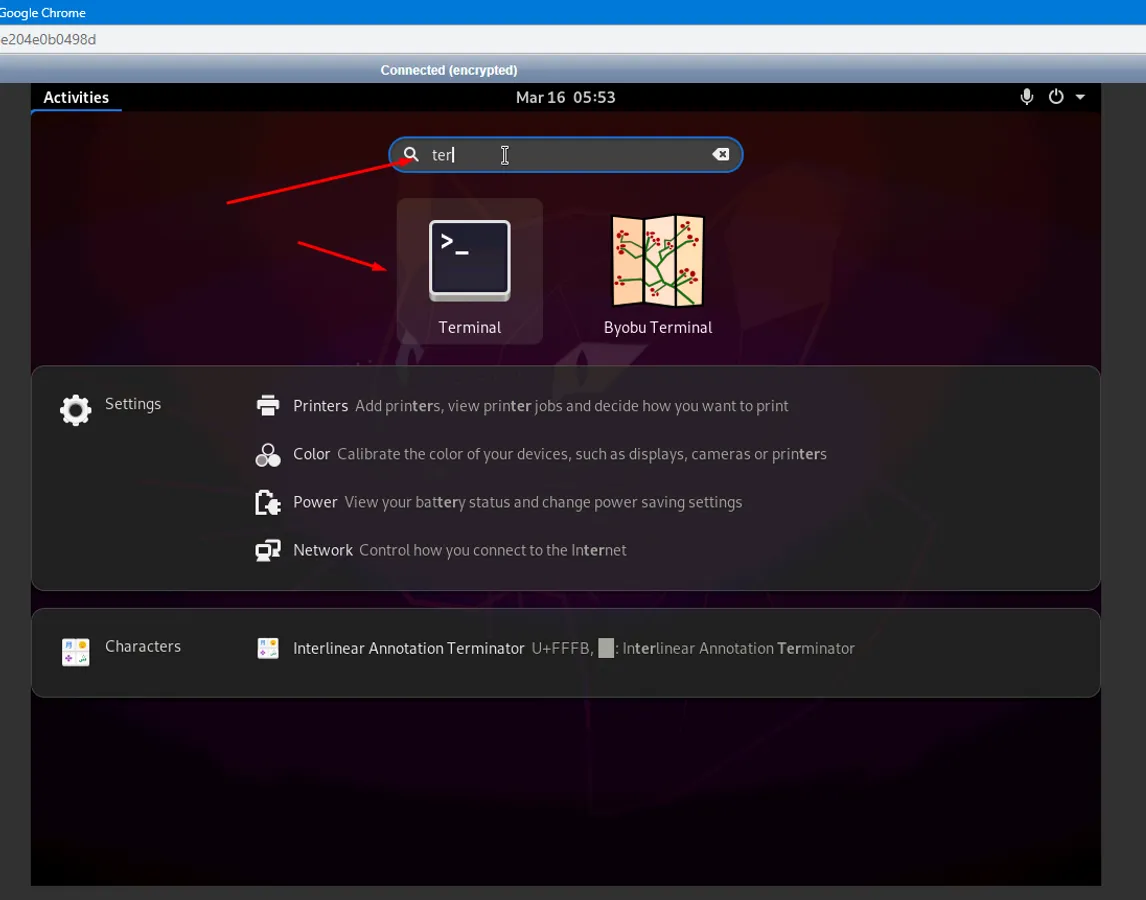
 We need to open Terminal app now, follow instructions on following screenshots:
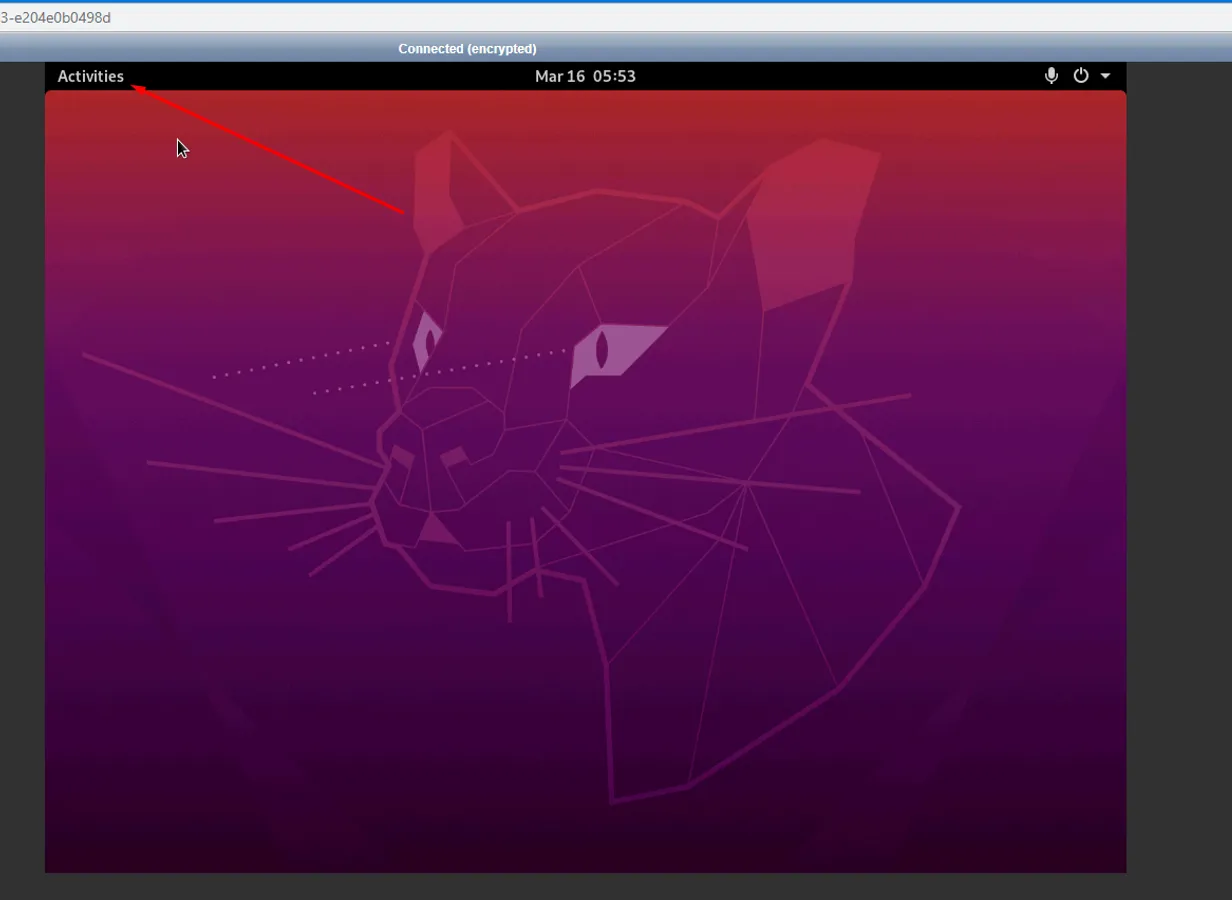 Start typing in search bar “ter”, select Terminal, run it:
 Input following command in command line:
/opt/Spacemesh/spacemesh_app --no-sandbox
In order to paste mentioned command in Terminal you need to copy it from this guide and press “Send Clipboard” button on top right:
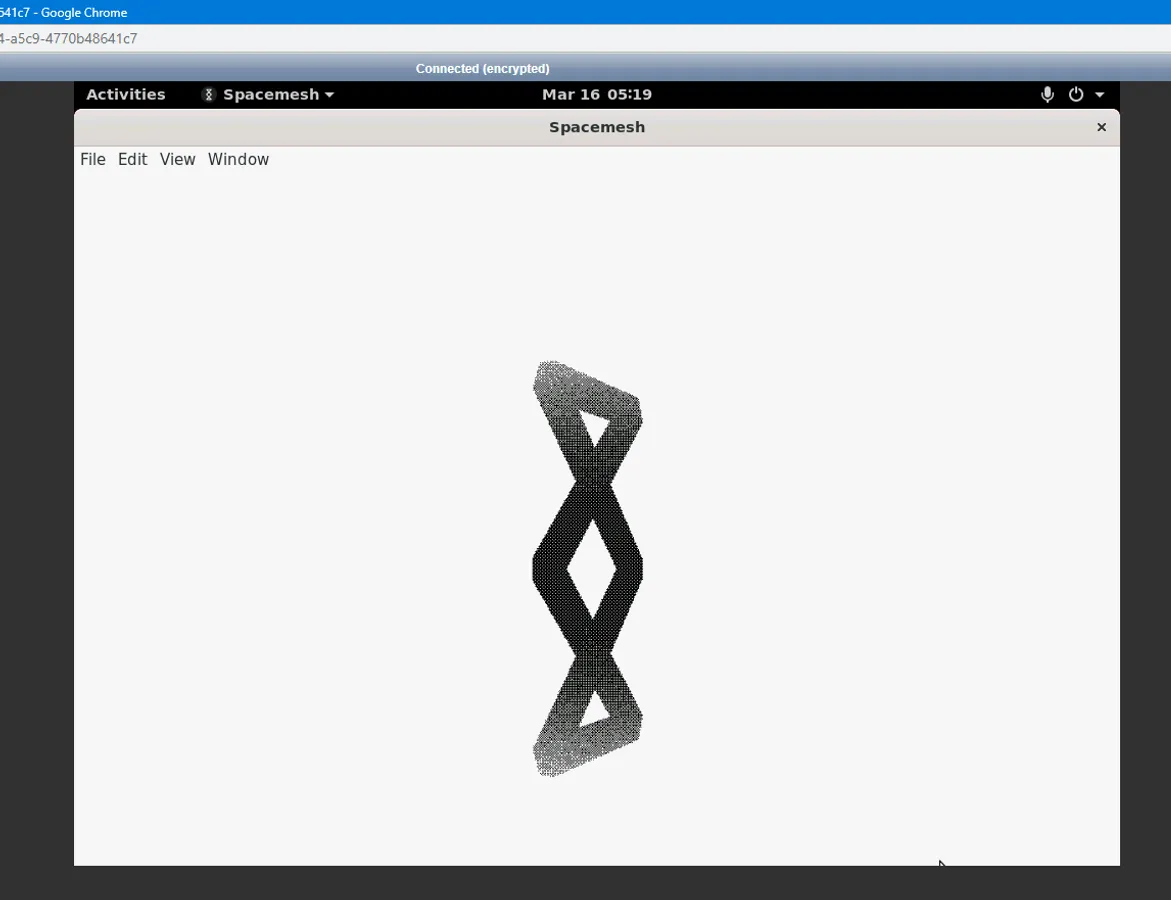
 Hitting Enter in command line will start Spacemesh app, wait for it to load:
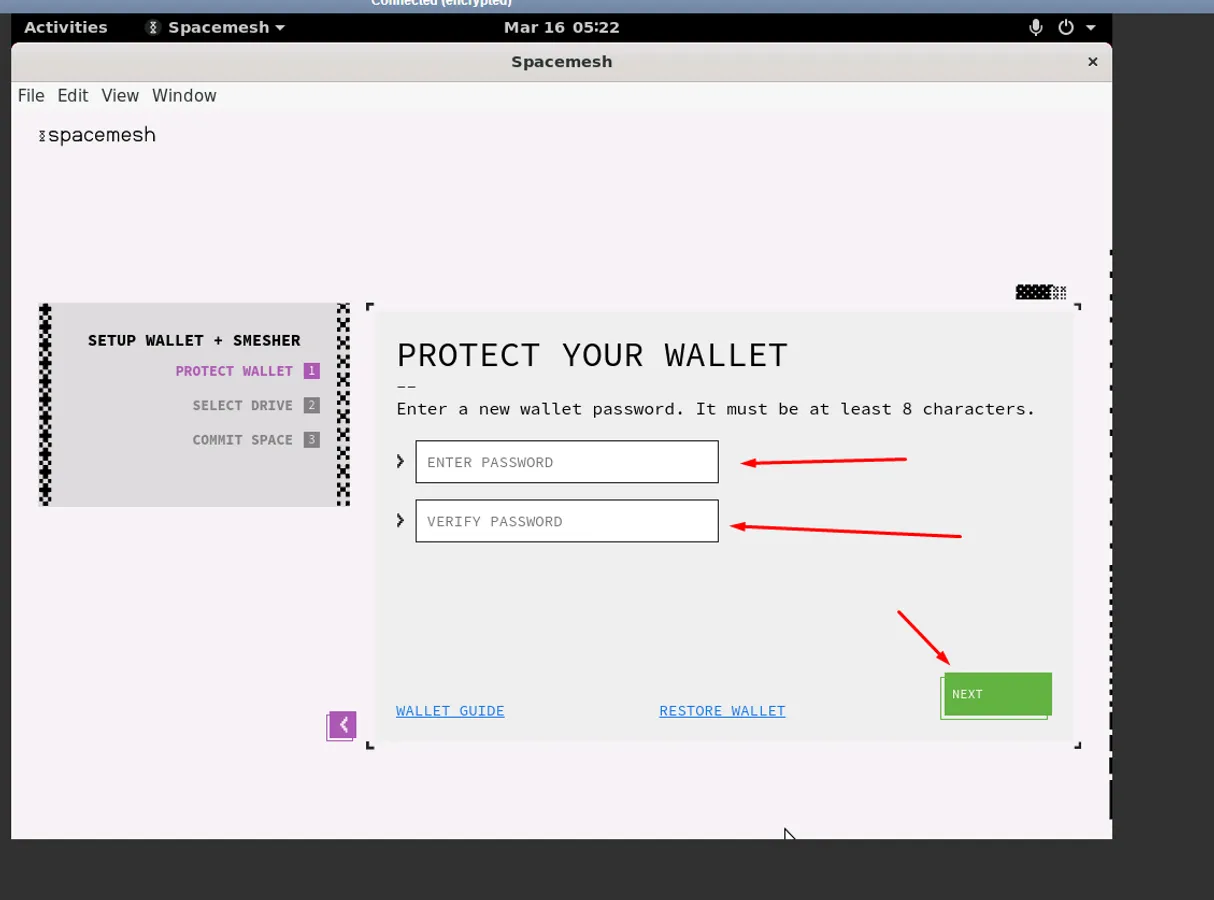
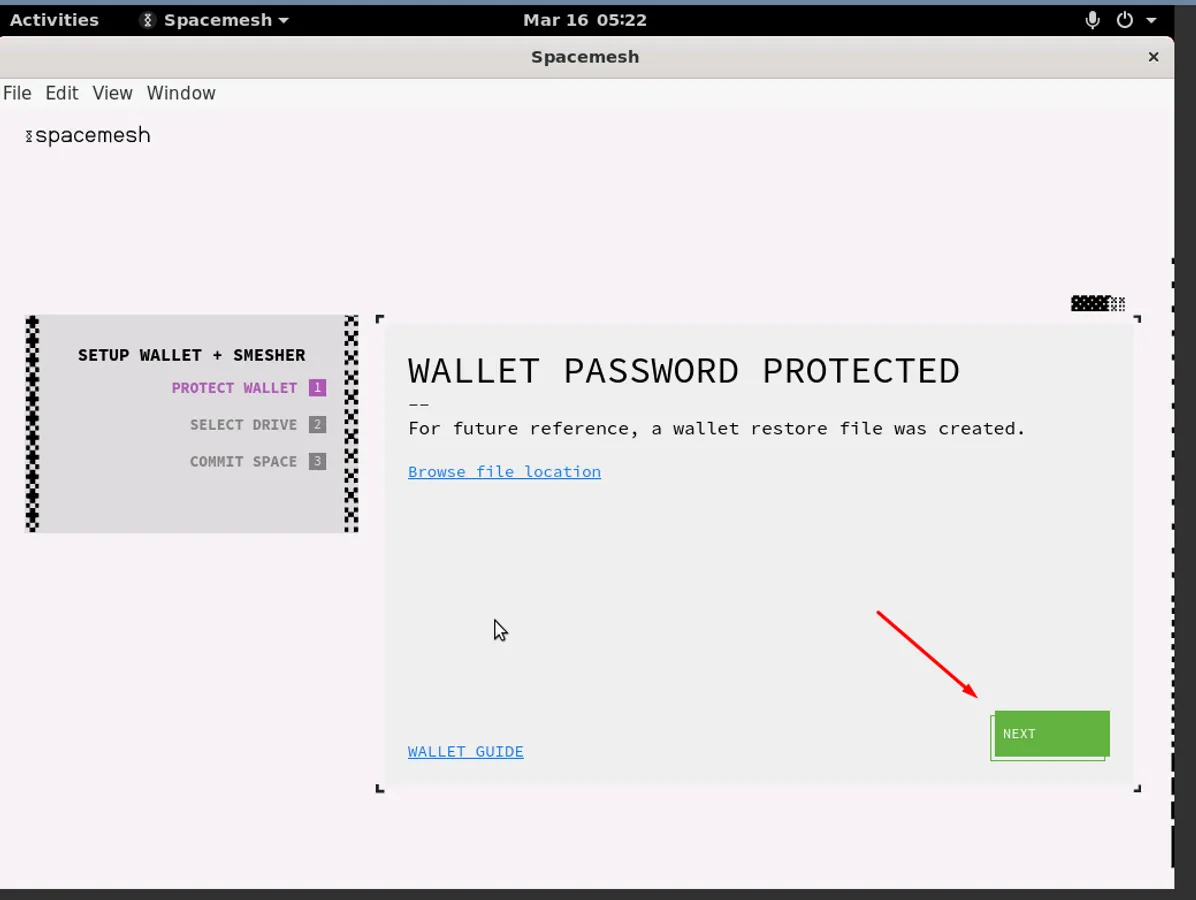
 Set wallet password (you wallet will be stored at ~/.config/Spacemesh, we recommend to back it up in safe place):
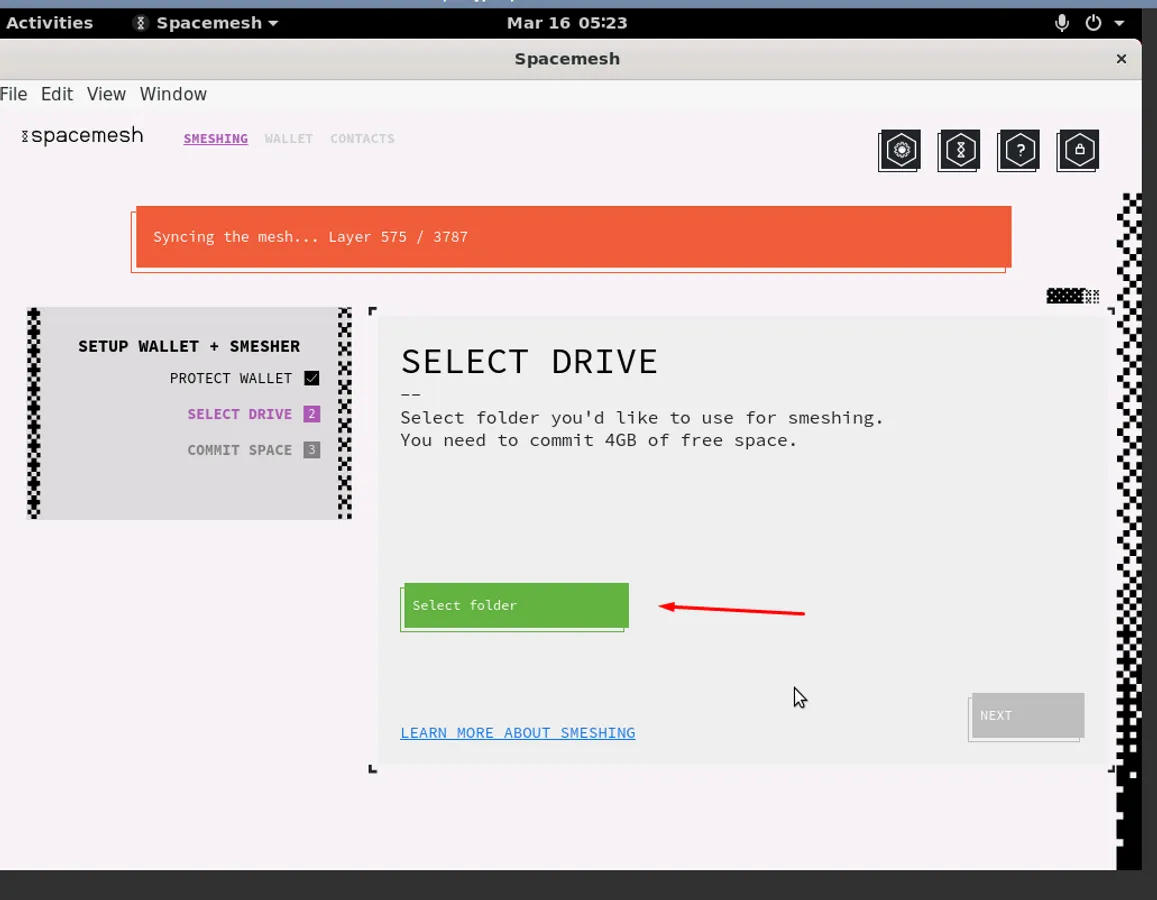
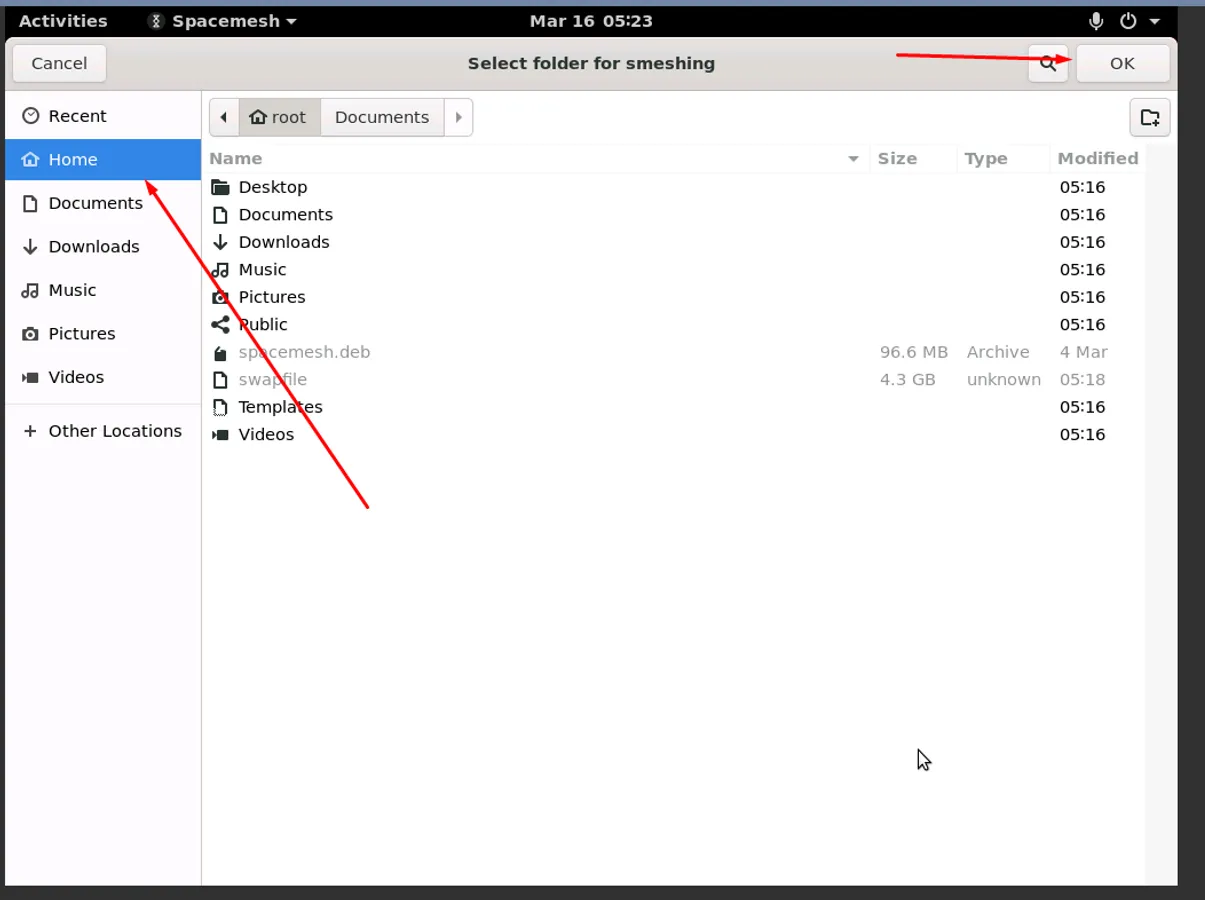
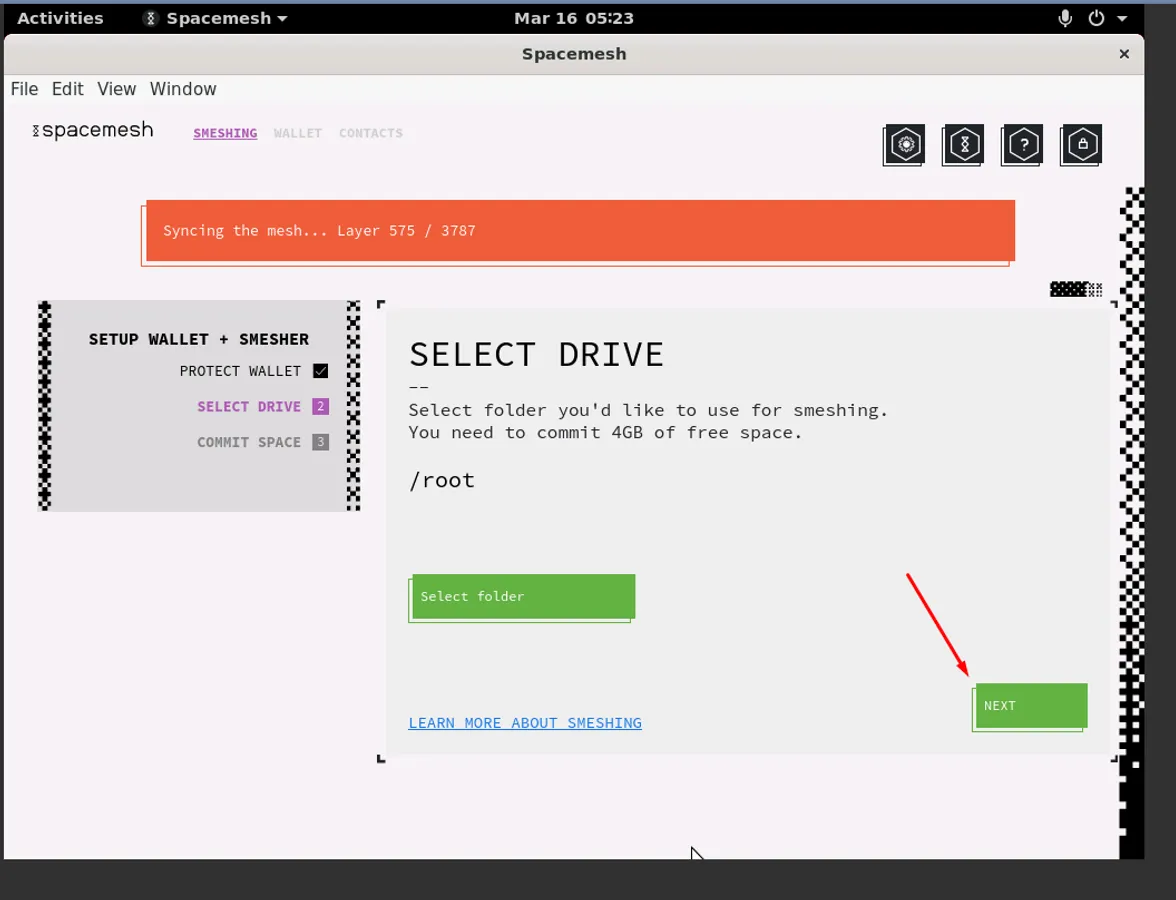
 Choose folder, which will store application files:
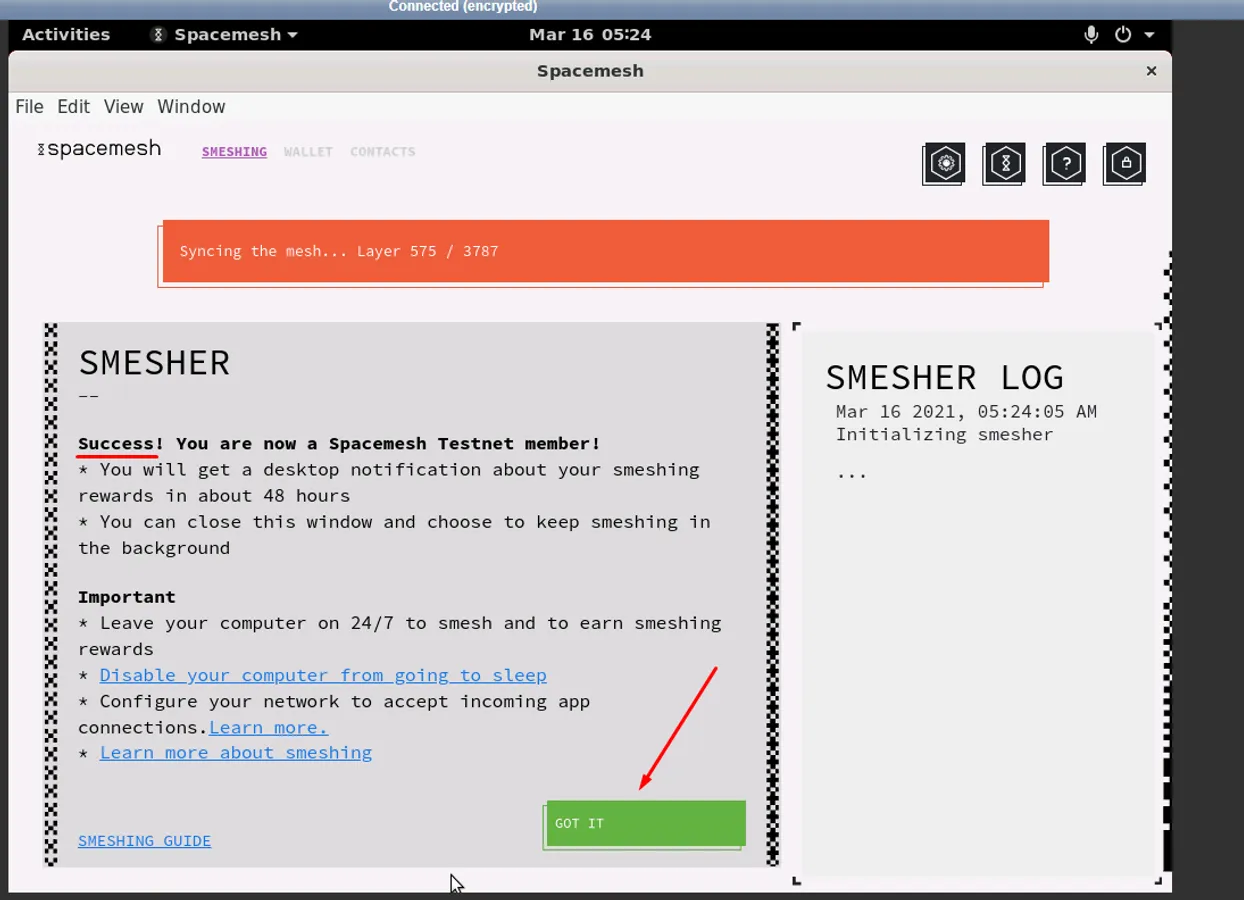
 You should see “Success” message, click “Got it”:
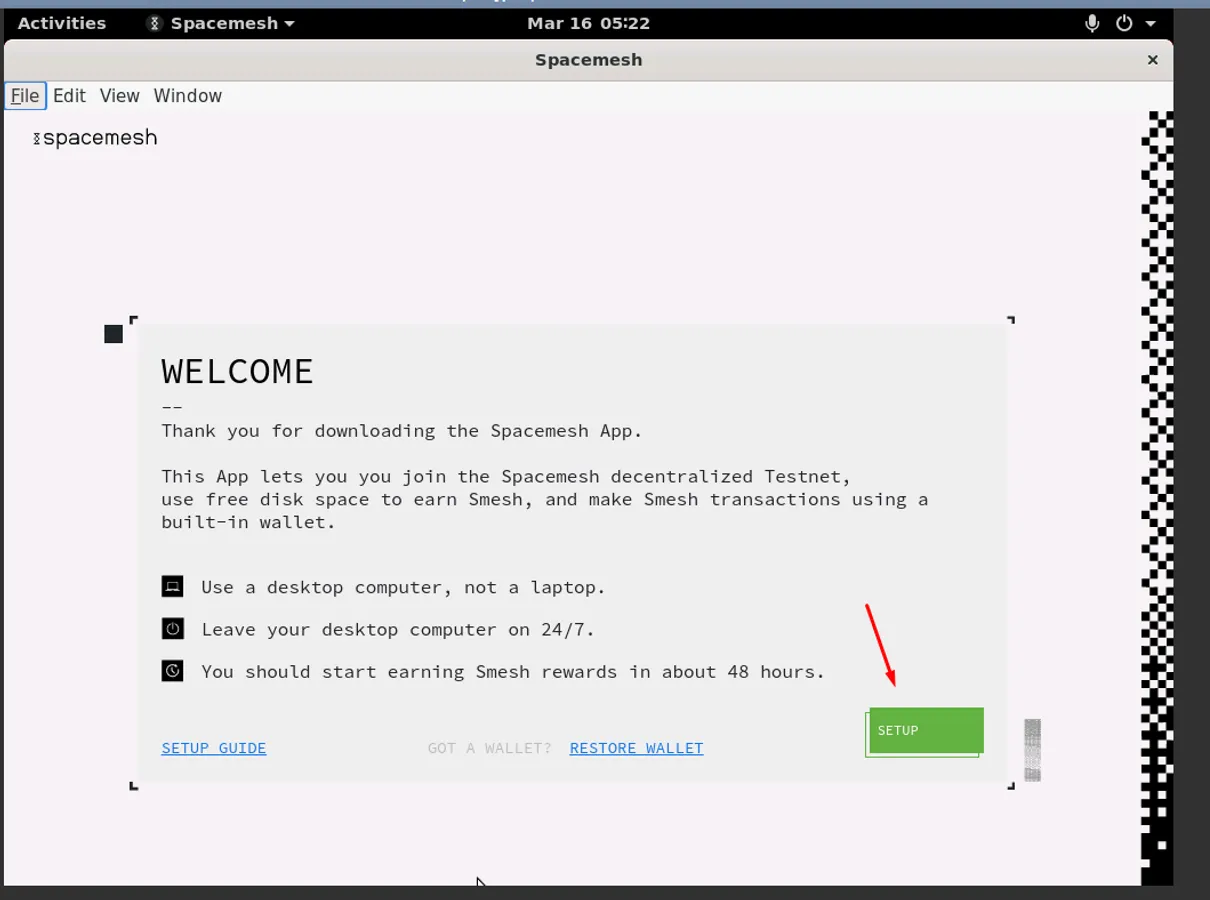
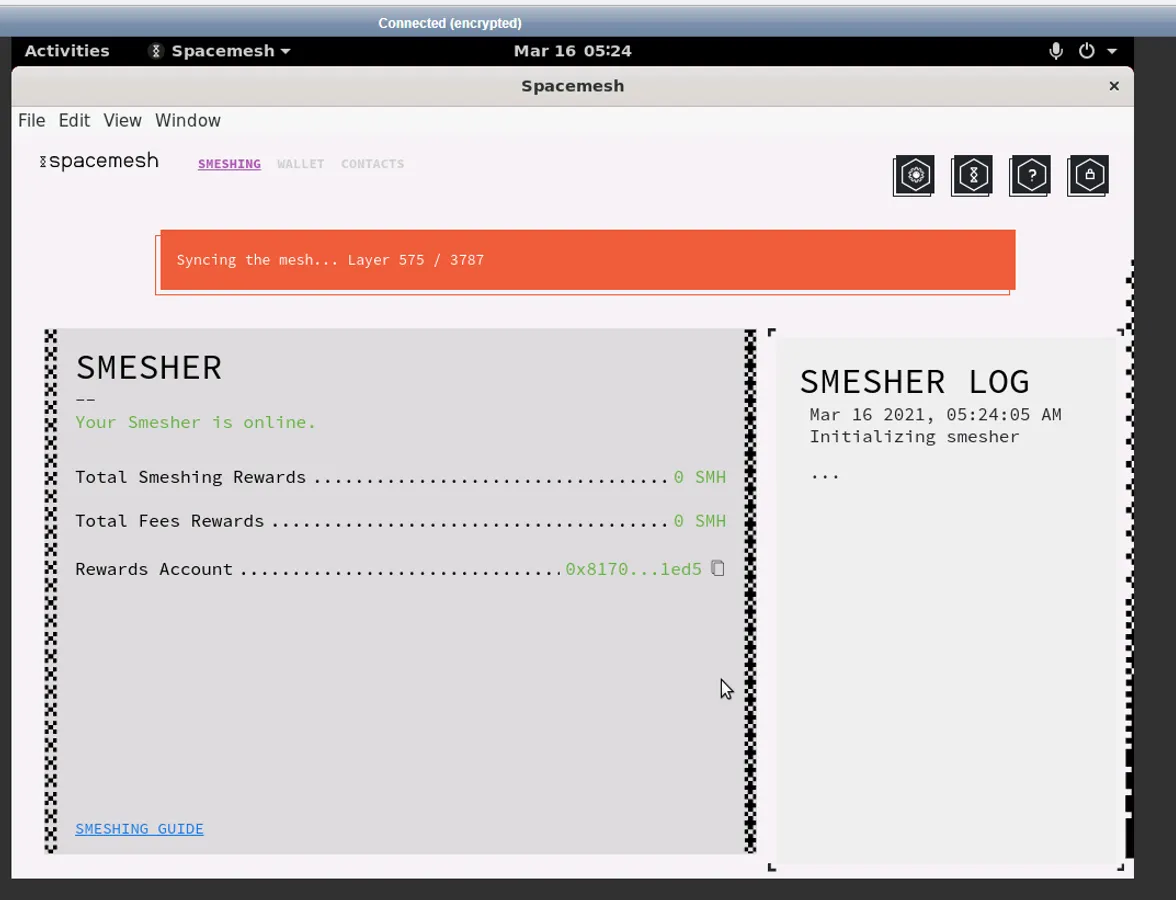
 In the end you should see something like this:
 Once everything is ready, you can close browser window with Vultr Console – Spacemesh app will continue to work. If you want to check that it works – get back to View Console in personal dashboard at Vultr.
After setting up smeshing on your computer you will get your first reward in about 49 hours. After this, you will begin receiving a reward at least once a day.
Updates #
For update do the following commands:
wget -O spacemesh.deb https://storage.googleapis.com/smapp/v0.1.24/ubuntu20_04/spacemesh_app_0.1.24_amd64.deb
sudo dpkg -i spacemesh.deb
/opt/Spacemesh/spacemesh_app --no-sandbox
Enter your password, Spacemesh will continue working.